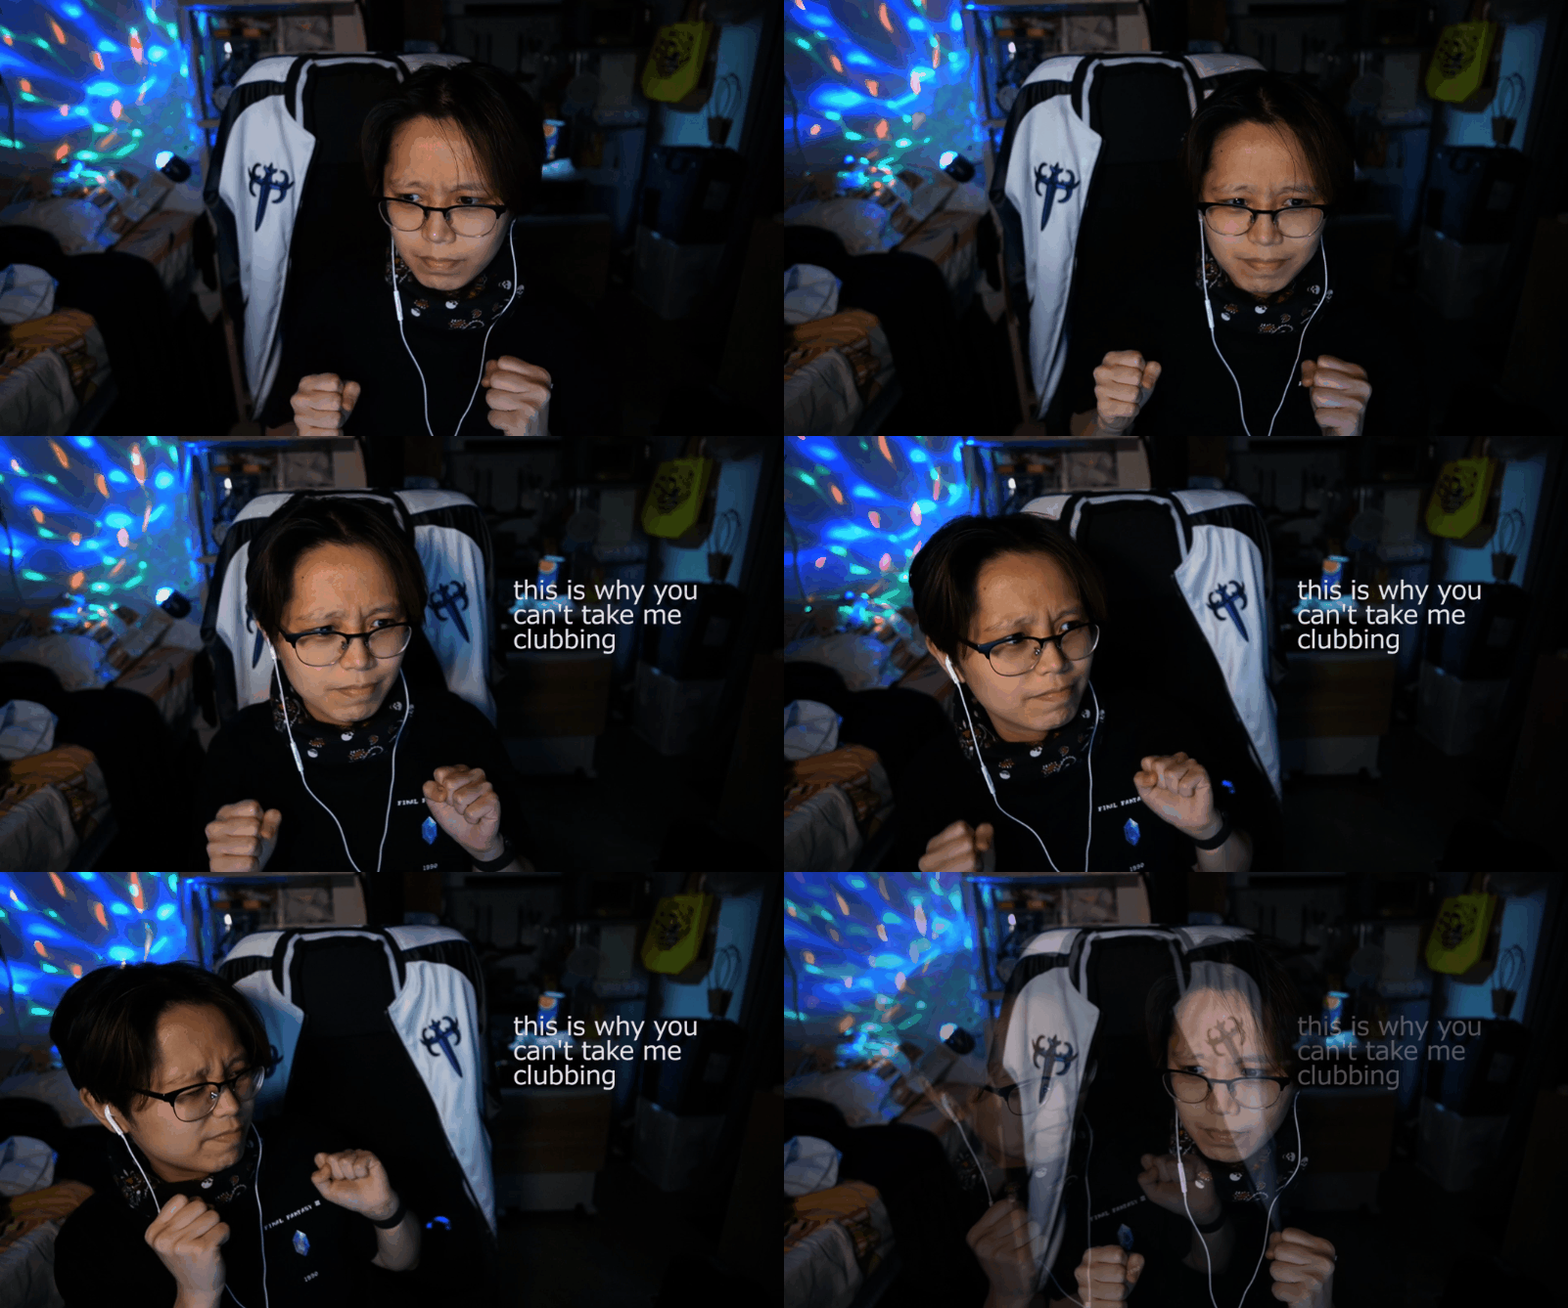
Connecting Disco Lights & Music to HubSpot Deals
Create your own disco party whenever your sales team is winning on HubSpot! Because Closed Won City deserves the HYPEEEEE
┏(・o・)┛♪┗ ( ・o・) ┓♪
Originally built in Dec 2022.
Table of Contents
Get Your Sales Team Dancing Every Time They WIN
How this Disco Party Gets Started
Creating Your IFTTT Applet
Get Your Sales Team Dancing Every Time They WIN
Closing a great deal is rewarding but why not make it extra special with a disco party in your office? The idea for this solution came about from our company purchasing a small gong that we were meant to strike whenever we closed a deal. I thought, "surely, there should be a way to automate a celebration like this", and if we're going to automate it, we might as well take this thing all the way.
I then recalled a video I watched a few months back. It was of this Twitch streamer called Crossmauz (WARNING: Link contains bright flashing lights) who would throw a rave every time he got a kill in Call of Duty. His raves would include loads of pumping loud music, heavy strobing lights and even some pyrotechnics. I wanted to create a milder version of this that would be safer and more appropriate for the workplace. Ergo, a disco party.
Solution
In my apartment, I have a few smart home devices that can be triggered on/off using IFTTT. I also knew that IFTTT automations could be triggered via webhooks. If you have HubSpot's Operations Hub Professional, you can call webhooks in workflow actions. All I needed was:
- A reasonably-sized disco light that could be switched on and off with a smart plug.
- A method of playing music at the same time as the disco lights were triggered.
How My Disco Party Works
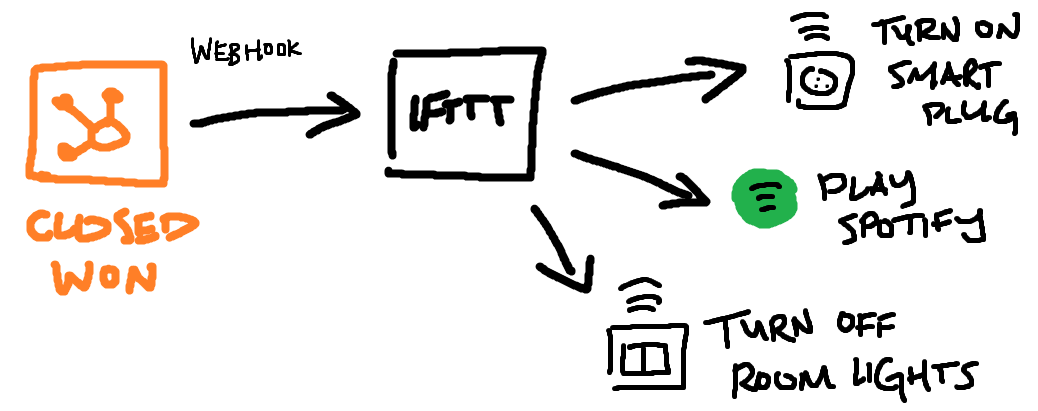
- HubSpot workflow is triggered by closed won deal, then calls a webhook generated by IFTTT
- IFTTT receives data from webhook, and then triggers the following actions:
- Turn on the smart plug connected to the disco light
- Play music on Spotify
- Turn off other lights in the room
About the Music
If you have an Android device or an Alexa, I recommend using that instead of Spotify. The Spotify action in IFTTT only triggers playback of the current track on your active device, which means that you always need to have your disco music ready for the disco party. With Android and Alexa, however, you are able to trigger whatever track you want without having it at the ready for this automation.
Alternatively, you could also get IFTTT call your phone via VoIP and set your ringtone for that contact as your disco party music.
About this Flowchart
If you have a developer who is able to spend time figuring out API calls for each of these smart devices, you can skip the IFTTT step entirely and simply create custom code actions in the workflow.
Step 1: Purchasing & Preparing Your Smart Devices
There are a variety of smart devices you can use to enable this experience for your space. Which one you use will depend on the sockets, plugs and switches you want these smart devices to interact with. The main thing you only need to look out for is whether they can be integrated with IFTTT or via custom coded actions on HubSpot.
Disco Lights + Smart Plug
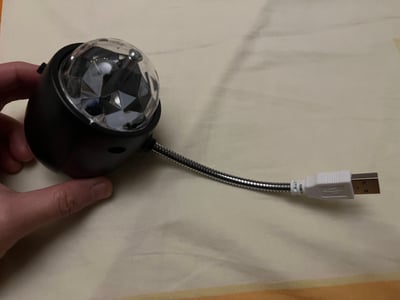
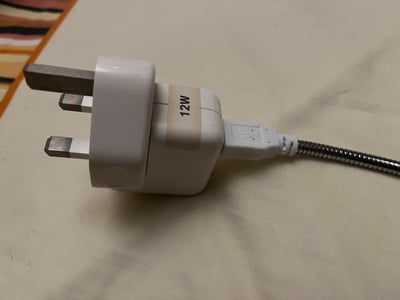
Ideally, you'll want to purchase a disco light without a battery so you can toggle it on/off based on whether your smart plug is supplying it with electricity. For my setup, I could've easily bought a large secondhand disco light but decided against it given the limited space in my room. Instead, I opted for this small USB-powered light that I spotted at the Temple Street Night Market. I connected it to one of the USB plugs I had lying around the house, which I then attached to my smart plug.
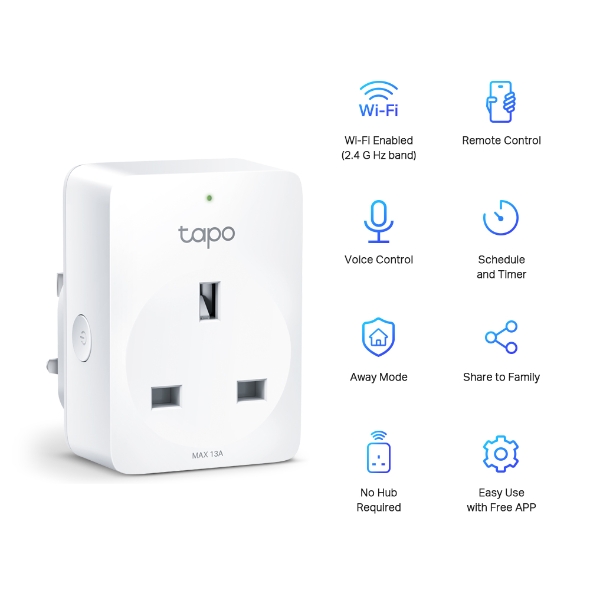
For the smart plug, I chose the TP-Link Tapo P100, mostly because it's one of the more affordable options from a known brand that also integrates with IFTTT.
Alternate Solution
If you can't find a disco light that can be toggled on/off via a plug, you're likely to find one that uses an infrared (IR) remote instead. These can thankfully be controlled with using a SwitchBot Hub Mini Smart Remote which includes an IR blaster. Similar to a universal remote, you'll just need to teach the device to mimic the IR command and toggle your disco lights on/off or even change colours. All of these commands can be triggered via IFTTT.
Room Lights
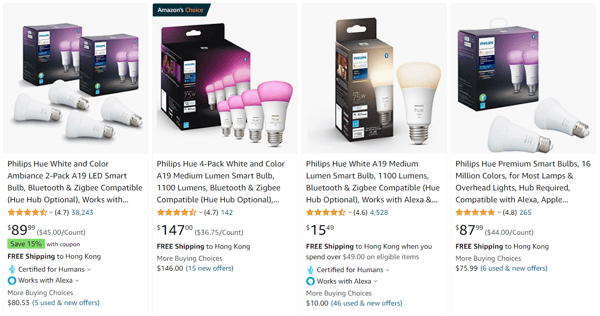
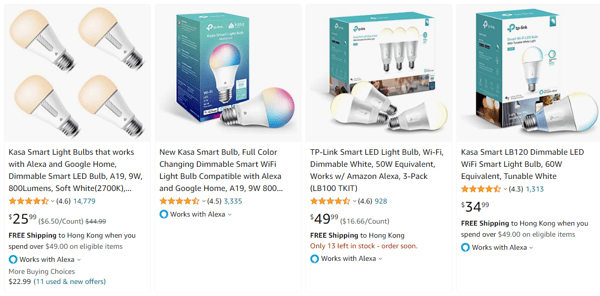
Smart bulbs from Philips Hue or TP-Link's Kasa line would do the trick here if you are able to install them. Otherwise, you can also consider getting smart light switches that are also available in the Philips Hue and Tapo ecosystems.
Before you buy into any of these ecosystems, however, it would be good to check a few reviews. I do believe the Philips Hue ecosystem requires extra hardware to sync the lights and tends to be pricier than other competitors.
Installing smart bulbs and smart switches, however, was not an option for me since (a) I had a fixed LED light on my ceiling and (b) I didn't want to install anything unnecessarily in the apartment I'm renting. Instead, I opted to use a SwitchBot Bot paired with a SwitchBot Hub Mini. The SwitchBot Bot works as a device that physically presses and pulls on a light switch for you to toggle it on/off. The Hub Mini, on the other hand, enables us to trigger these actions remotely from the app or IFTTT.
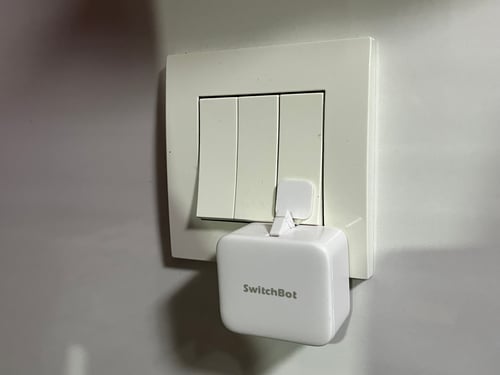
Compared to the smart plug/switches solution, you'll notice a few seconds delay before the switch is turned off after it's triggered (due to the number of devices involved and the physical mechanism needing a bit of time to work) but hey, it worked well for comedic timing in my original video. ¯\_(ツ)_/¯
Music
For my setup, I had Spotify open on my desktop. I played a track so it would be considered my "active" device, and put my disco music on pause. When the IFTTT applet is triggered, my Spotify will play the track that is currently on pause on my "active" device.
Though this allows us to play music at the appropriate time, it may not be the most ideal setup. If you're looking to play a specific song, it will always have to be ready for when closed won happens. This means you'd need to dedicate a device and Spotify account for this, which is not great if you need to actively use it throughout the day.
As I mentioned above, this would work better if you have an Android device or Alexa available because IFTTT can directly play tracks on those devices. You don't need any of the high-end models for this to work, so you can get away with purchasing budget versions of those devices to get this sorted.
Step 2: Creating Your IFTTT Applet
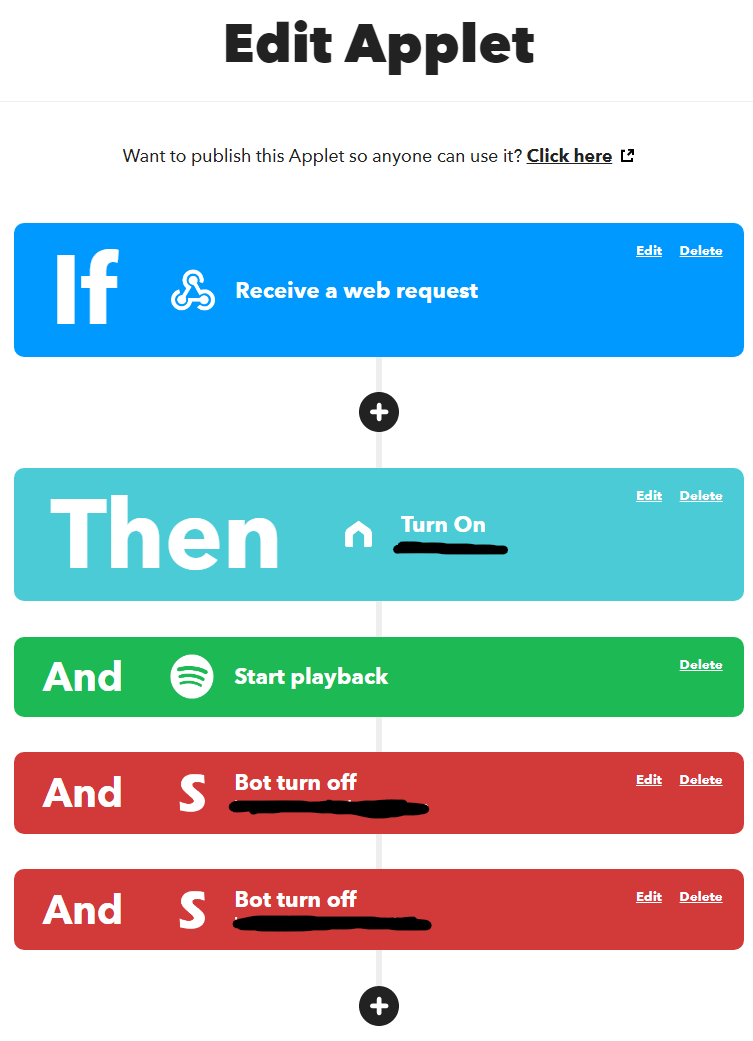
If you have a developer who can work directly with APIs, then you can skip this step and go directly into HubSpot to create your workflow with custom-coded actions. This bit is for those who want to go the low-code route. Below is the Applet I created to
Trigger: Webhooks
For the "If" module, we select "Webhooks". It really shouldn't matter which request type you select since we won't be using any data from the deal here, but I did go for the simple "Receive a web request" option here.
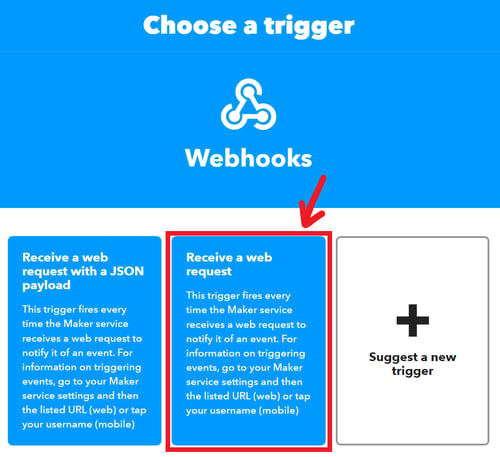
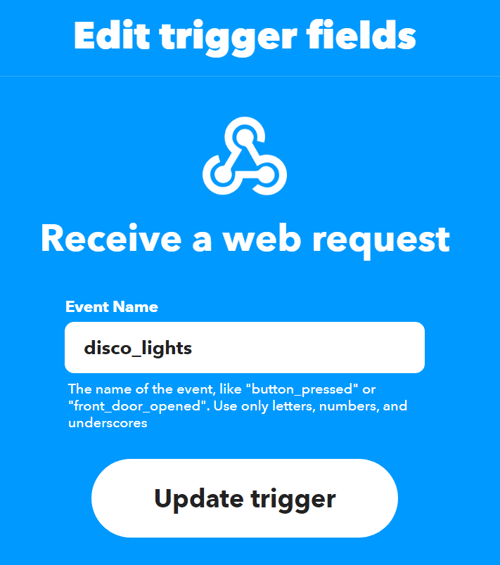
Once you select this, you will be prompted to give the event a name. You can name it whatever you want but do note this down as we'll need this to generate our webhook link for the HubSpot workflow.
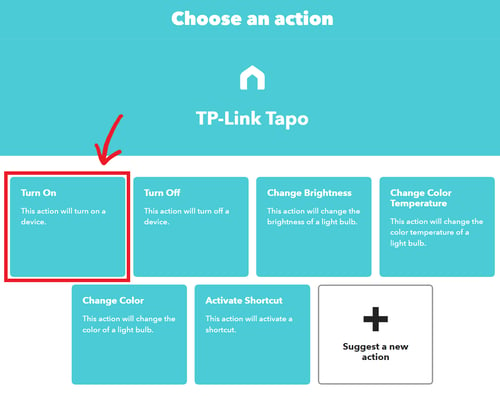
Action: Turn on Disco Lights / Smart Plug
Search for your smart plug provider in IFTTT's service directory. You'll want to find an action that turns the plug on like below:
Action: Turn On Music
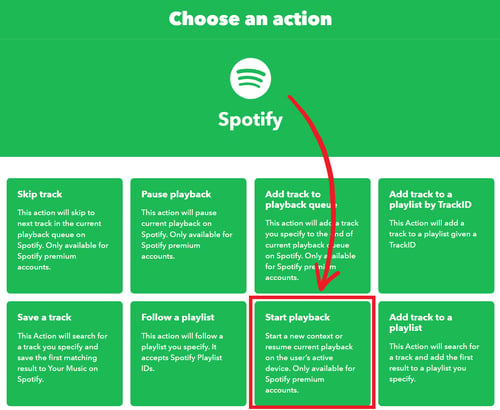
If you're using Spotify, select "Start playback".
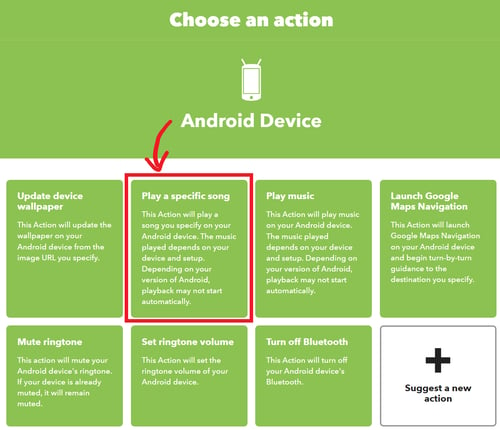
On Android, "Play a specific song". You'll be given a text box where you can type out what song to play on your Android device when the Applet is triggered.
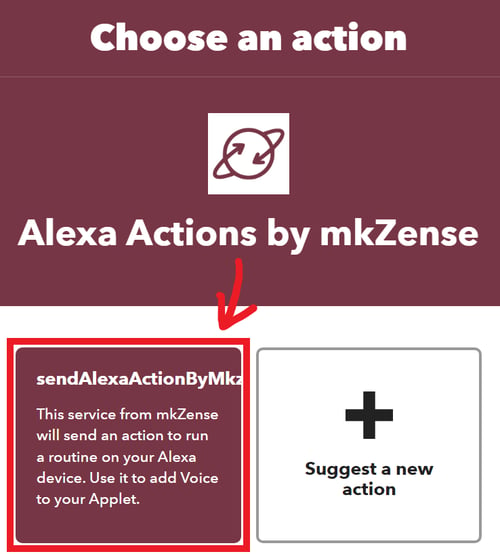
And for Alexa, find "Alexa by mkZense" service and select the only action available there. To make this work, you'll also need to set up an Alexa routine that plays the song of your choice on your selected device.
Action: Turn Off Room Lights
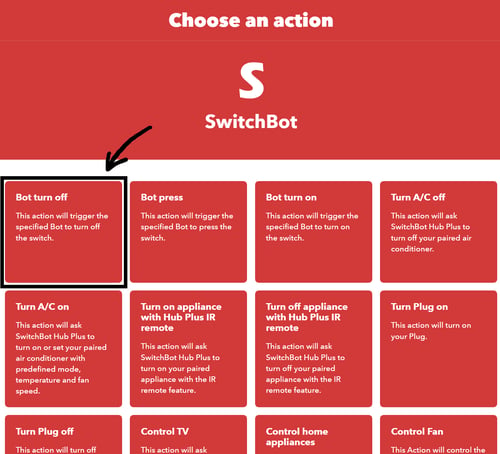
Search for your smart lights/device provider's service in the IFTTT service directory, and search for an action that turns off your lights. In my case, I selected "Bot turn off" under "Switchbot"
Step 3: Setting Up Your HubSpot Workflow
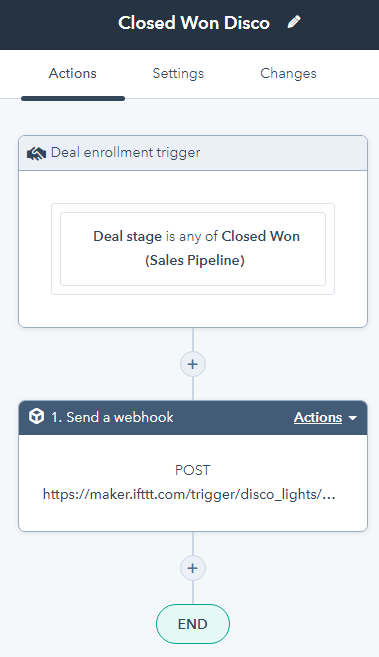
This step should be pretty straightforward. Create a deal-based workflow and set your trigger to the closed won pipeline stage of your choice. I personally turned re-enrollment on in case of any issues with the deal, but I leave it to you to decide whether you would like to follow the same setup.
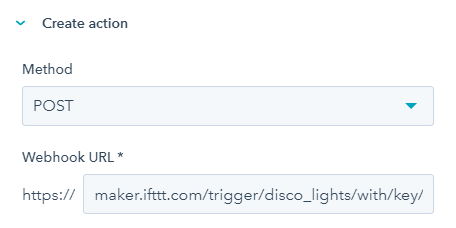
After you've set up your trigger, add a "Send a webhook action" and select "POST" as the Method in the dropdown. The format of your webhook URL should be:
maker.ifttt.com/trigger/{event name}/with/key/{key}
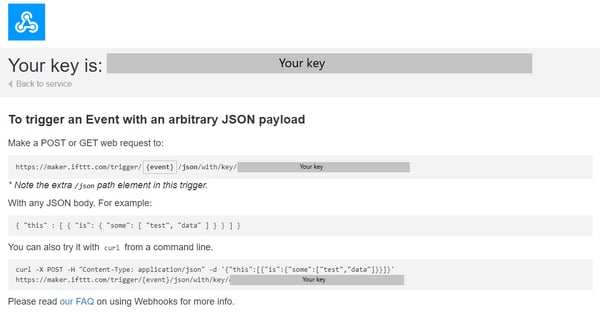
The event name in the link will be the same as the event name you created in your Applet trigger. As for your key, you will need to grab this from the IFTTT webhooks service. Visit this link and click the "Documentation" button, which should lead you to a page that looks like the screenshot below. You can copy-paste the key from this page into the link, and put the updated URL into the "Webhook URL" field on the workflow action.
Once you're done with that, your action should look something like this:
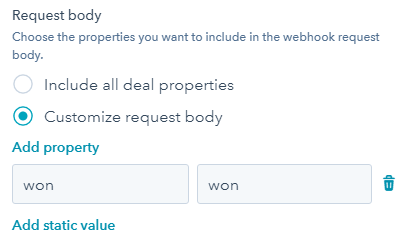
 For the request body, you'll want to customize this so you're not pushing unnecessary data into IFTTT. You need to add at least one value here in order to save the action, so what I did was add a static value with some dummy text.
After saving, you can now turn your workflow on and give it a go!
And there you have it!
If you have any comments or questions, do feel free to reach out to me on LinkedIn. Happy HubSpotting!
